
Spanghew for Keenetic
Spanghew on the router — for the whole home network. Only the sites and apps you choose go through your subscription; everything else goes directly, as before.
Apps for Android, iPhone, Windows and macOSWhat you need
- A Keenetic or Netcraze router with KeeneticOS 4.2 or newer (Netcraze calls the system NDMS). The version is shown on the main page of the router settings. Not every model will do: first find your model number in step 4 of “Preparing the router”. Spanghew has been tested live on Titan KN-1811 and Skipper KN-1910 (Ultra and Viva in Russia); on models that take the Mips command it has not been run yet.
- The “Open Package support” and “Proxy client” components and Entware — in the router's internal memory or on a USB drive, about 35 MB is needed. How to install them is in “Preparing the router” below.
- A subscription link — the same
https://…you paste into the Spanghew app, or avless://server link. - A computer in the home network — commands are typed in the router console once; everything after that is done in a browser.
Preparing the router
You do this once: the router components and Entware — the set of programs Spanghew is installed into. If Entware is already there, go to setup.
-
Open the component list
Open the router settings (usually
http://192.168.1.1) → system settings — the gear icon on the left → the KeeneticOS and updates tab → the button that changes the component set.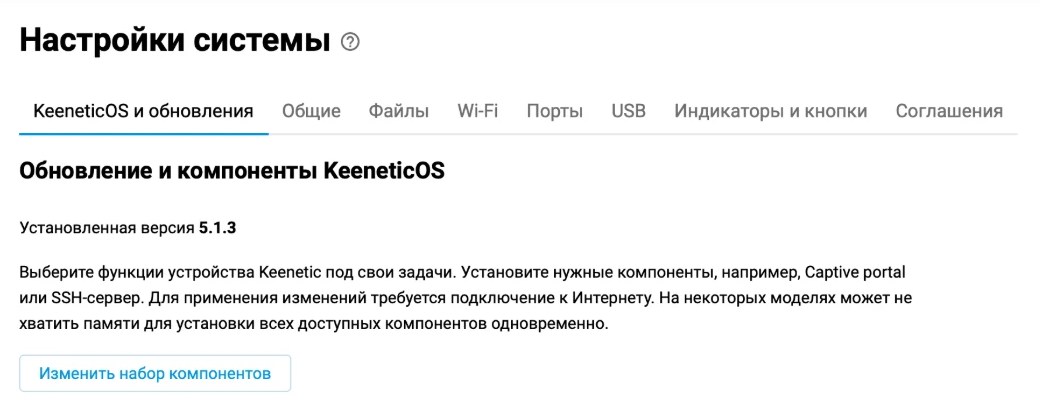
In KeeneticOS 4 the same section is “General System Settings” → “KeeneticOS Update and Component Options” → “Component options”. The pictures show the Russian interface.
-
Tick the components
A window with the operating system components opens. Type a name into the search field and tick the box on the right — for every component in the list:
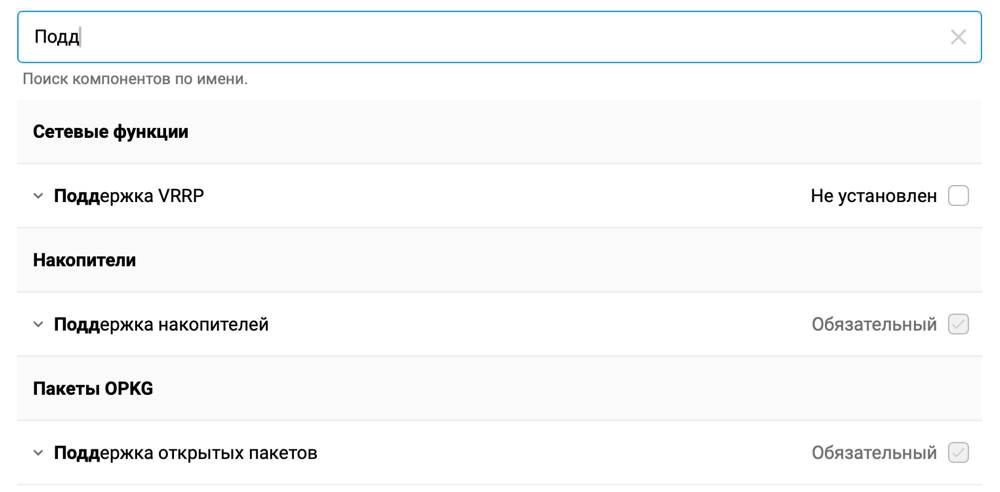
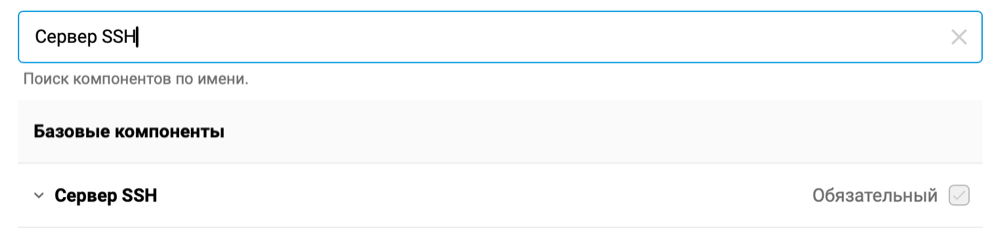
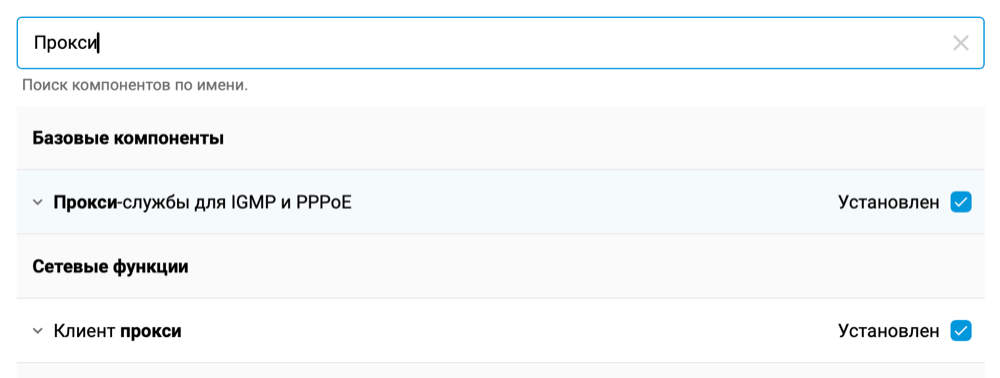
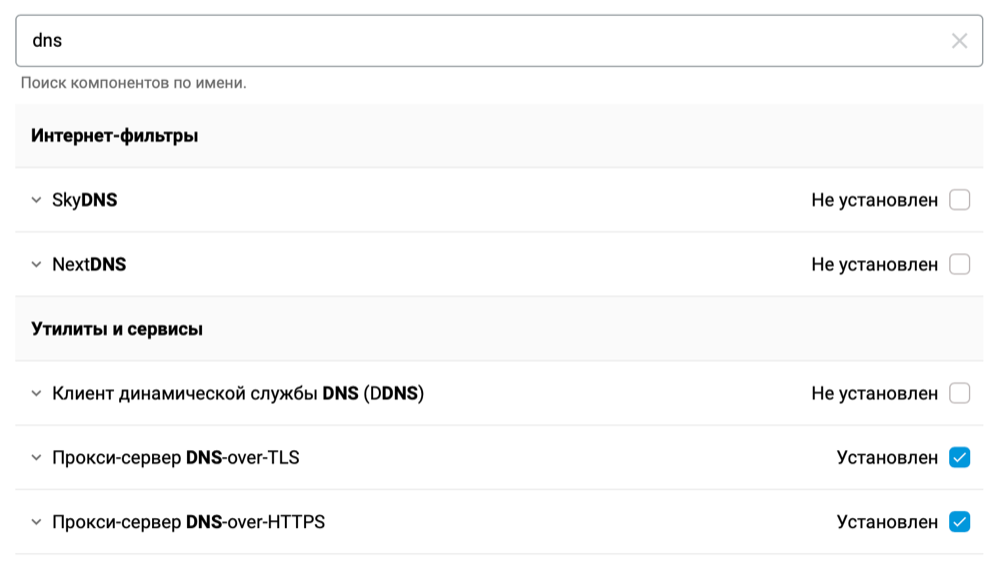
A component marked as installed or required, with a grey tick, is already there — nothing to do. After ticking the missing ones, press the update button at the bottom of the window:

The router downloads the components, updates KeeneticOS to the latest version and reboots — there is no internet for a few minutes. The two DNS components hide the router's own address lookups from the provider: without them it sees which sites you open.
-
Open the router command line
In a browser open the address of the router settings with the letter
aat the end:http://192.168.1.1/a. The “Web CLI” page opens.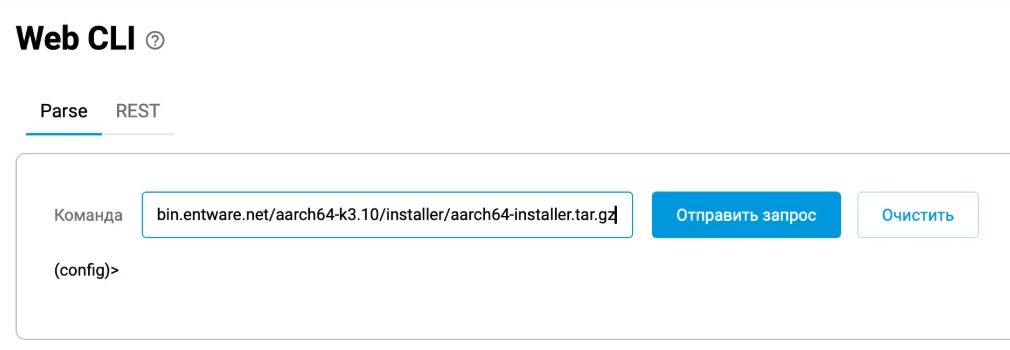
-
Install Entware with one command
There are three commands — you need one, the one for your model. The model number —
KN-orNC-and four digits — is printed on the label under the router. Find it in one of the lists, copy the command below that list, paste it into the field and send it.Go by the number, not the name: Hero, Titan, Hopper and Hopper DSL with different numbers need different commands. A similar number will not do — it must be exactly yours.
Mipsel — if your number is in this list:
KN-1010 Giga KN-1011 Hero / Giga KN-1810 Titan / Ultra KN-1910 Skipper / Viva KN-1912 Skipper / Viva KN-1913 Skipper / Viva NC-1913 Viva KN-2310 Hero 4G KN-2311 Hero 4G+ KN-2610 Giant KN-2910 Skipper 4G KN-3810 Hopper
opkg disk storage:/ https://bin.entware.net/mipselsf-k3.4/installer/mipsel-installer.tar.gz
Aarch64 — if your number is in this list:
KN-1012 Hero / Giga NC-1012 Giga NC-1013 Giga KN-1811 Titan / Ultra KN-1812 Titan NC-1812 Ultra KN-2312, NC-2312 Hopper 4G+ KN-2710 Peak KN-3611, NC-3611 Hopper DSL KN-3811, NC-3811 Hopper KN-3812, NC-3812 Hopper SE KN-4110, NC-4110 Hero 5G NC-4210 Titan SE
opkg disk storage:/ https://bin.entware.net/aarch64-k3.10/installer/aarch64-installer.tar.gz
Mips — if your number is in this list:
KN-2010 DSL KN-2012 Launcher DSL KN-2110 Duo KN-2111 Carrier DSL KN-2112 Skipper DSL KN-2410 Hero DSL / Giga SE KN-2510 Ultra SE KN-3610 Hopper DSL
opkg disk storage:/ https://bin.entware.net/mipssf-k3.4/installer/mips-installer.tar.gz
Web CLI answers with the line
disk is set to: storage:/.— the installation has started: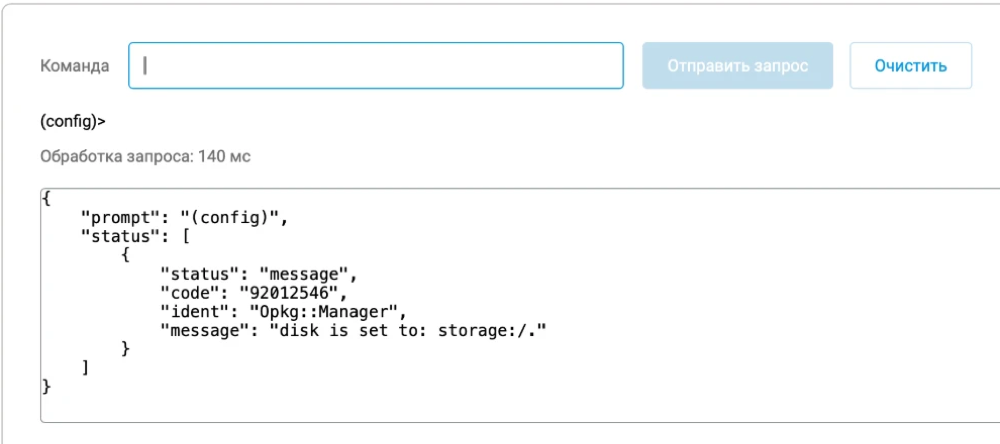
USB drive only: KN-1212 (4G), KN-1410 (Omni), KN-1710, KN-1711 and KN-1713 (Carrier, Extra). For these models Keenetic help describes installing Entware only on a USB drive — the commands above are not for them. Open Keenetic help, pick your model and find the article “Installing the Entware repository on a USB drive”. KN-1212, KN-1410 and KN-1710 are not on that site — the same article in English is on support.keenetic.ru: KN-1212, KN-1410, KN-1710.
Your number is in none of the lists — do not send a command at random. Open Keenetic help (for NC- models — Netcraze help), pick your model and find the article “Installing OPKG Entware in the router's internal memory”. The right archive is named there in the note “For … model, use the … archive”; the example further down the article is always about mipsel — ignore it. No such article — the help does not describe installing Entware into this model's internal memory, and we have no command for it.
The lists were compiled on 9 October 2026 from Keenetic and Netcraze help: they hold every model for which installing Entware into internal memory is described there. The one-command install works from KeeneticOS 4.2 — on an older version update the router first.
-
Wait for the installation to finish
The router downloads the archive and installs Entware into its internal memory — a minute or two. To check: “Diagnostics” → “System Log”. The installer writes to the log in Russian: it has finished when a line starting with
[5/5]appears near the end, as in the picture.
The log says “exec format error” and “doinstall: failed to start” — the command sent was for a different model. Sending it again does not help (“disk is unchanged”): first remove the failed installation — three commands in Web CLI, one at a time. The third erases the whole internal storage of the router: if you kept your own files there, save them first.
no opkg disk
no system mount storage:
erase storage:
Then go back to step 4 and send the command for your model.
If it did not install into internal memory (not every model has internal storage, and it is small), Entware goes on a USB drive with the ext4 file system. In Keenetic help pick your model (if it is not there — support.keenetic.ru; for NC- models — Netcraze help) and open the article “Installing the Entware repository on a USB drive”; the archive is for the same list as your command (mipsel, aarch64 or mips).
Setup — 10 steps
-
Open the router console
On the computer open Terminal (Mac, Linux) or PowerShell (Windows) and connect to Entware with the command below. The login is
root, the password right after installing Entware iskeenetic.You type the password blind: while you type, the line stays empty — no letters, no asterisks, the cursor does not move. That is how it should be: type the password and press Enter.
ssh root@192.168.1.1 -p 222
“Permission denied, please try again.” — the password was mistyped. Check the keyboard layout and Caps Lock and type it again — blind, as before.
Your router address may differ — it is the one you open its settings at. If it does not connect, try port 22: that happens when the router has no “SSH server” component.
“WARNING: REMOTE HOST IDENTIFICATION HAS CHANGED!” — this happens when Entware was installed on this router before: the computer remembers its previous key. Remove the old record on the computer and connect again:
ssh-keygen -R "[192.168.1.1]:222"
You are in the router console when the line starts with
~ #. The commands of the next steps are typed there, not in the computer's own window (PS C:\…>or your Mac's name). -
Change the Entware password
The password
keeneticis the same for everyone who installed Entware — with it any device in your network can enter the router console. Type the command and enter your own password twice — it is typed blind too, the line stays empty:passwd
After the lines
New password:andRetype password:type the password and press Enter; at the end the console answerspasswd: password for root changed by root. Write the password down: you will need it to enter the console again. It has nothing to do with the Spanghew page — that one uses the router administrator password. -
Teach the router to download over https
Without these two packages it cannot fetch Spanghew from the site. Paste the command and press Enter:
opkg update && opkg install wget-ssl ca-bundle
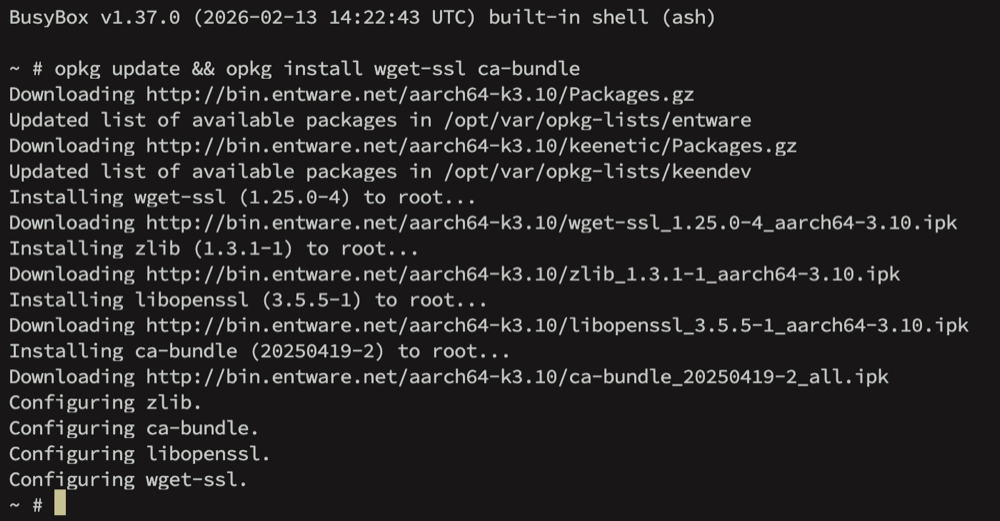
Done when the last lines start with “Configuring” and the
~ #prompt is back. -
Install Spanghew
The command downloads the installer and runs it: it detects the router processor, checks the package signature and installs Spanghew.
wget -qO /tmp/spanghew-install.sh https://spanghew.io/keenetic/install.sh && sh /tmp/spanghew-install.sh
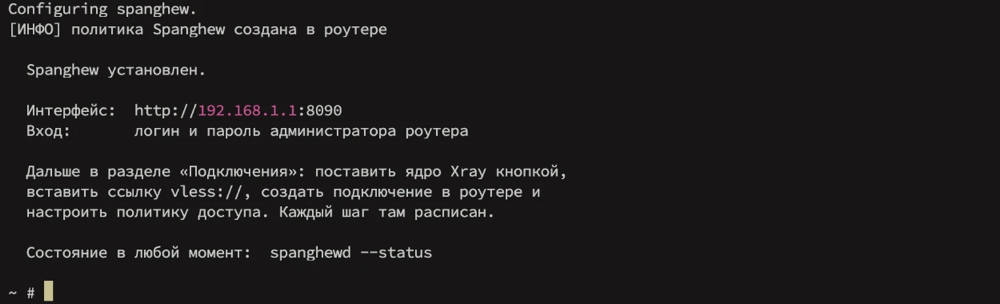
It takes about a minute: a few Entware helper packages are installed along with Spanghew. The console is no longer needed — you can close it.
-
Open the Spanghew page
In a browser on a computer or phone connected to the router open the address from the last lines of the installation. Sign in with the router administrator login and password — the same ones as for its settings.
http://192.168.1.1:8090
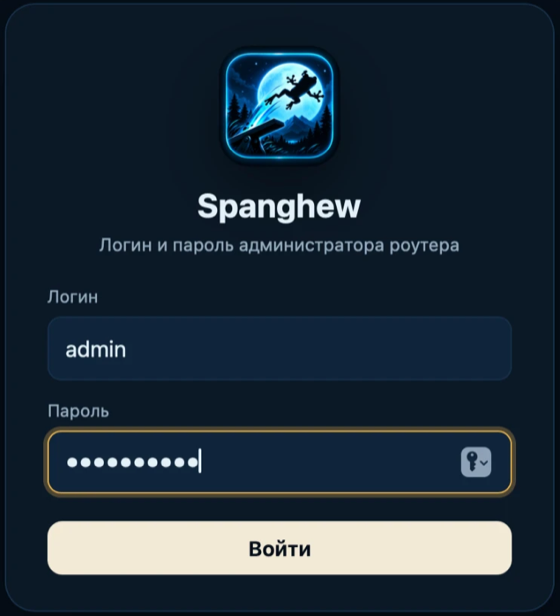
The pictures show the page in Russian; the language is switched at the bottom of its side menu.
-
Install the core and create the connection
The “Connections” section, the cards on the right — in order:
1. Xray core — press “Install”. About 10 MB is downloaded, a minute or two; the page refreshes itself.
2. Router connection — press “Create”. The button first shows what exactly it changes in the router settings: it adds a proxy connection to Spanghew.
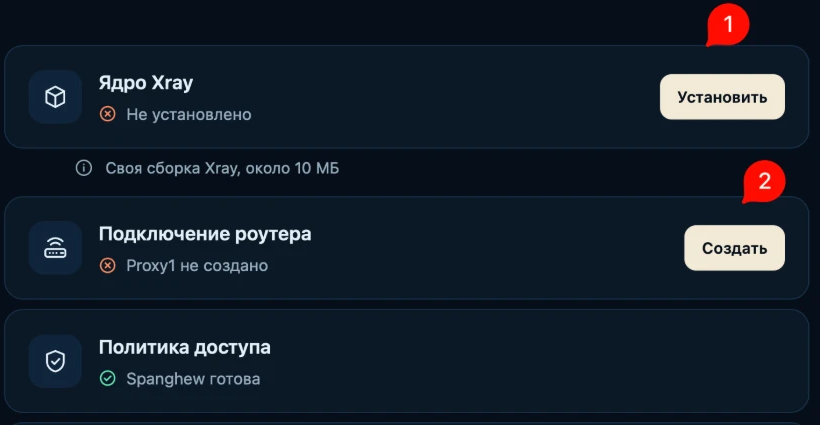
The “Spanghew” access policy is created during installation — its card has a green tick from the start.
-
Hide the router DNS from the provider
In the same place, lower — the “Router setup” card, the “Clean DNS servers” part. Leave Cloudflare, Google, Quad9 and “Disable ISP DNS” ticked and press “Install”.
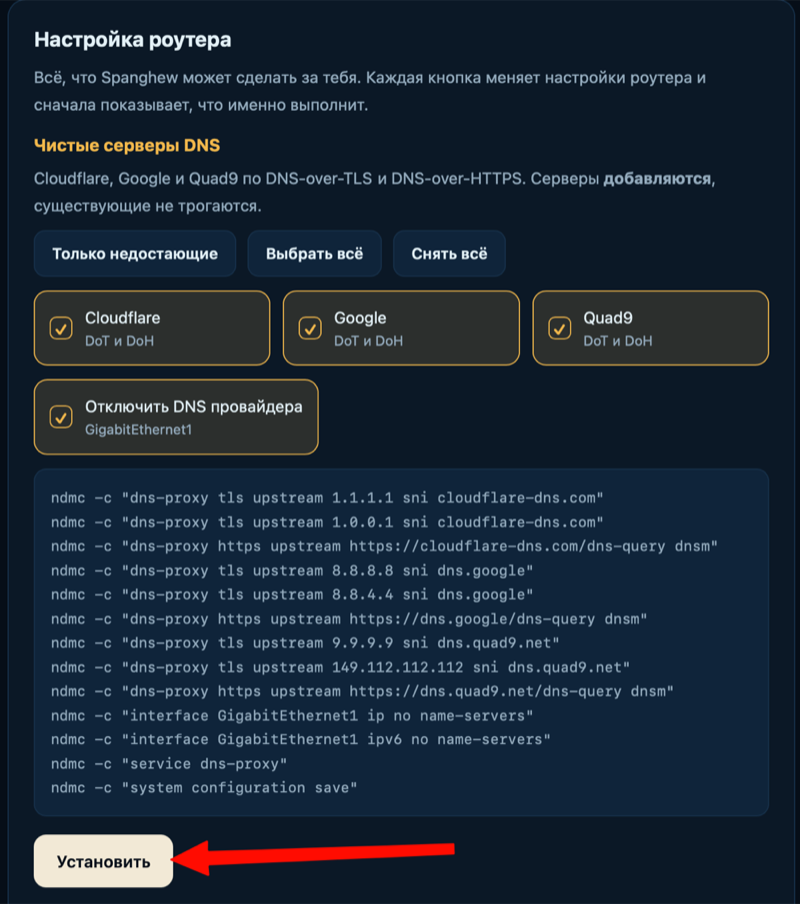
The button shows the commands it will run. After it the router looks up site addresses over an encrypted channel, and the provider neither sees nor forges the answers. This is what the DNS-over-TLS and DNS-over-HTTPS components from “Preparing the router” are for.
-
Choose what goes through Spanghew
The “Rules” section. The YouTube, TikTok, Discord and Telegram groups already exist and are on. The “Group” button adds others from a ready-made set or an empty one — for your own sites.
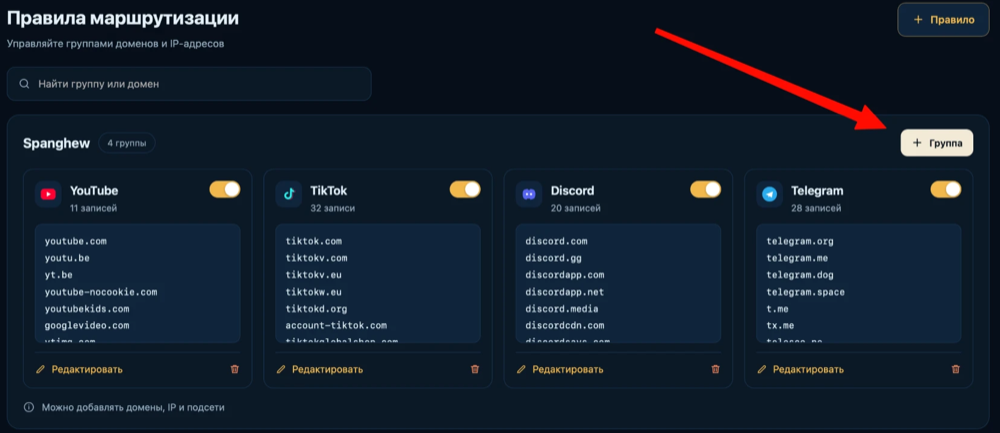
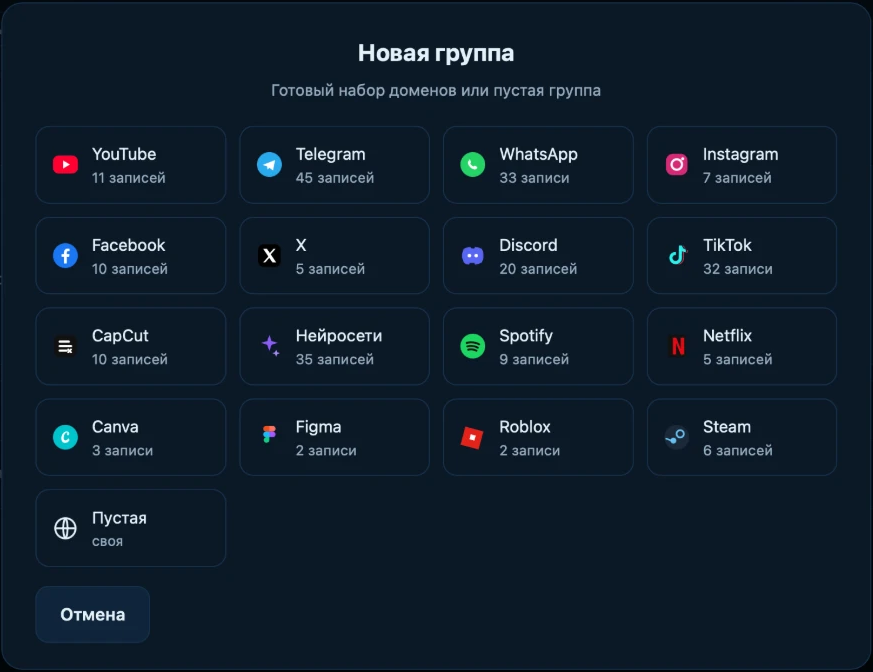
After changes a bar appears at the bottom — press “Save and apply”, otherwise nothing changes:
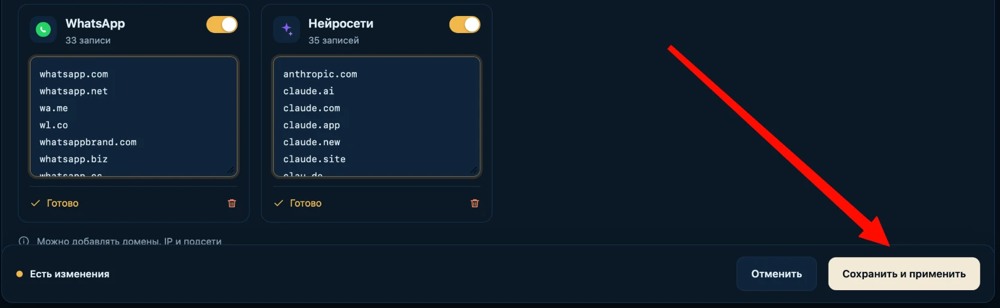
Everything that is not in the lists goes directly — as before the installation.
-
Paste the subscription link
The “Connections” section, the “Server” card. Press “Replace connection”, paste the subscription link
https://…(or avless://server link) and press “Save and start”.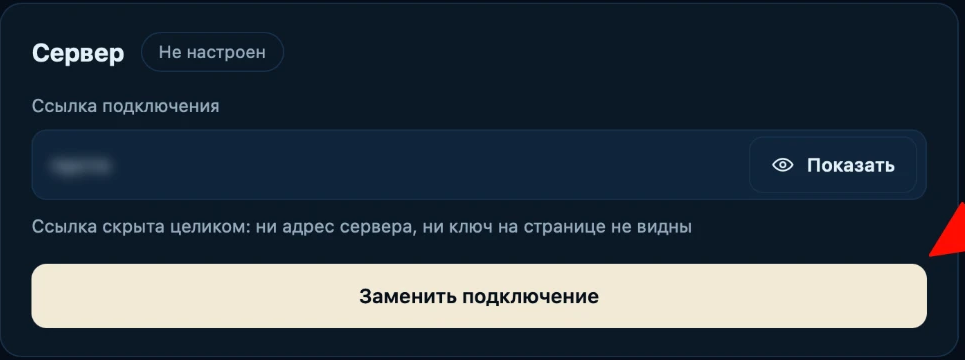

The link is hidden on the page: neither the server address nor the key is visible. If the subscription has several servers, a list appears under the card — pick one and press “Switch server”.
-
Check
The page header should say “Core is running”, and all three cards on the right should have green ticks. Open something from the enabled groups on a phone or computer: the header changes to “Tunnel is up”.
Updates
When a new version is out, a mark appears next to the logo on the Spanghew page. “Information” → “Update” → “Update”. Settings, the subscription and the lists are kept.
Latest version: , published .
If an update was interrupted (the router was switched off, the internet dropped) and the page does not open, run the command from setup step 4 again: it does not touch settings or lists.
A site from the list does not go through Spanghew
Spanghew learns site addresses from the DNS answers that pass through the router. If a device asks for addresses bypassing the router, the router does not see them.
Check on that device
- “Private DNS” (Android) and “Secure DNS” in the browser are off;
- the Spanghew app and any VPN apps on the device are off: with them the device bypasses the router’s rules;
- on iPhone and Mac, iCloud Private Relay is off.
Telegram, WhatsApp and other groups defined by addresses work in any case. The Spanghew page has a “Router DNS” card with a check in the “Connections” section.
Private DNS can be blocked for every device at home at once: “Information” → “Leak protection” → “Block encrypted DNS that bypasses the router”. A phone with Private DNS set manually by hostname will have no internet until that is turned off.
The state in one command in the router console (the output is in Russian):
spanghewd --status
Recovery: the page does not open or sites do not work
Everything is done in the router console, as in setup step 1. These commands do not touch settings, the subscription or the lists.
Restart the service
spanghew restart
See what happened
The state and the last lines of the log (in Russian):
spanghewd --status
tail -n 40 /opt/var/log/spanghewd.log
Install again on top
Helps after an interrupted update and when the service does not start:
wget -qO /tmp/spanghew-install.sh https://spanghew.io/keenetic/install.sh && sh /tmp/spanghew-install.sh
Get the internet back as without Spanghew
Stop the service — sites from the lists go directly:
spanghew stop
If “No tunnel — no access” is on, sites from the lists do not open at all after a stop. To lift the block (since version 2.0.3):
spanghewd --remove-rules
To start again: spanghew start. After a router reboot the service starts by itself.
What Spanghew does on the router
- Installs its service and the Xray core into Entware. It does not change the router firmware.
- Adds one proxy connection and one “Spanghew” access policy to the router settings — by a button, showing the commands beforehand.
- Sends nothing through the subscription server by itself: no connectivity checks, no statistics. It sees whether the server is alive from the connections of your devices.
- If the service stops, internet and DNS at home keep working — sites from the lists simply go directly. With the “No tunnel — no access” switch (“Information” → “Leak protection”) they do not open instead, until the service starts again.
- Verifies updates by signature: the router will not install a package from a tampered site.
The router takes one device in the subscription limit — like a phone or a computer.
Remove Spanghew from the router
The command removes the service, the Xray core, settings and logs:
wget -qO /tmp/spanghew-rm.sh https://spanghew.io/keenetic/uninstall.sh && sh /tmp/spanghew-rm.sh
After that delete the proxy connection and the “Spanghew” policy in the router settings by hand: “Connection priorities” → “Access policies”.